
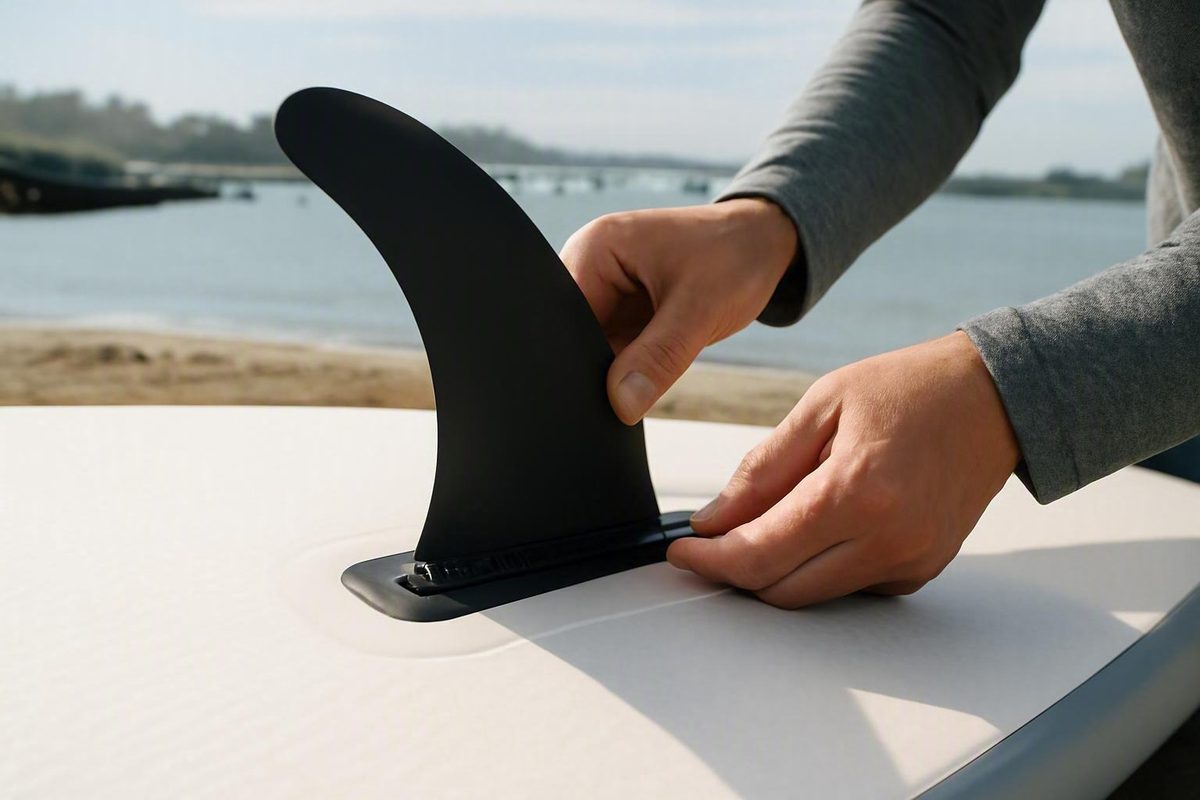
Start Here: The Compatibility-First Replacement Process
Paddle-board fins are not universally interchangeable. Boards use different fin boxes, base shapes, screw positions, pins, tabs, catches, and locking mechanisms. A replacement can have the same advertised depth as the original and still be completely incompatible.
For a reliable paddle board fin replacement, make decisions in this order:
- Identify the board by brand, exact model, and model year if known.
- Identify the missing fin’s position—center, left side, or right side.
- Identify the attachment system from the fin box and locking hardware.
- Inspect the box and remaining parts for cracks, deformation, or missing hardware.
- Match the original fin unless you have a specific reason to change the board’s handling.
- Confirm compatibility with the manufacturer or seller before ordering.
- Install the fin according to its mechanism, check it by hand, and test cautiously near shore.
This guide synthesizes manufacturer, retailer, and specialist instructions rather than reporting independent product testing. Model-specific instructions should take priority whenever they differ from general guidance.
Terms such as “universal,” “tool-free,” “quick-release,” and “fits most US boxes” describe a product category or installation feature. They are not fit guarantees. “Tool-free” means you may not need a screwdriver; it does not mean the fin fits every tool-free box. The box must be identified before size, material, price, or claimed performance becomes relevant. Glide distinguishes US-style, proprietary click-in, and FCS/Futures mounting systems.
Before shopping, take clear photographs of:
- The board’s identification label
- The entire underside of the tail
- The empty fin box from above and both sides
- Any remaining center or side fins
- The original fin, even if it is cracked
- Every loose screw, plate, pin, lever, catch, tab, washer, or clip
- Any brand name, part number, arrow, or molded marking
- The fin box and surrounding board material if either looks damaged
Record whether the board is inflatable or hard, but do not select a fin from construction alone. Inflatable boards can have US-style boxes, slide-in tracks, hook-and-pin systems, or proprietary locks. Hard boards can also use several different systems. The installed box and attachment method are decisive.
If a candidate fin will not enter, seat, or lock with reasonable hand alignment, stop. Check for a reversed fin, debris, misaligned hardware, a mismatched base, or damage to the box. Do not grind, drill, bend, trim, strike, or force the replacement. Installation guidance for common systems calls for cleaning the box, aligning the parts, and seating them cautiously rather than modifying the fin.
A like-for-like replacement is normally the safest purchase when the original setup worked well. Change the size or shape only when you can identify the problem you are trying to solve—for example, repeated bottom strikes in shallow water or unsatisfactory tracking on longer flat-water paddles.
Identify Your Fin Box and Locking System
Examine the empty box rather than relying on the fin’s appearance above the base. Fins that look similar can use completely different attachment mechanisms underneath.
US-style center box
A US-style center box is a track-based system. A typical fin has a tab or metal dowel at one end of its base and a screw hole at the other. The dowel enters the wider opening and slides beneath the box rails. A small plate sits in the track and receives the screw after the fin hole and plate are aligned.
Some versions require a screwdriver. Others have a larger screw head designed for hand tightening. Both can belong to the same broad box family, but the fin base, hardware position, and usable track length must still be compatible.
A US-style box is normally used for a center fin. Do not confuse it with a side-fin plug simply because both systems involve screws.
Slide-in inflatable system
A slide-in fin has a long plastic base that enters a matching track, usually from one end. Once the base is fully seated, a plastic pressure-fit pin or locking tab passes through an aligned slot to stop the fin from sliding out.
Visible clues include:
- A straight molded track
- No loose screw-and-plate assembly
- A crosswise slot near the end of the installed base
- A separate plastic pin or integrated retaining tab
Two slide-in fins can differ in base length, rail shape, pin position, or track profile. A product described as a “slide-in SUP fin” is therefore a candidate, not an automatic fit.
Flip-lock, click-lock, quick-lock, Smart Lock, and hook-and-pin systems
These systems are usually recognizable by a moving or pressure-fit component, such as:
- A hinged lever that flips closed
- A catch that presses down behind the fin
- A base that clicks into a channel
- A front hook combined with a retaining pin
- A roller or locking end that snaps into a track
Product names are not standardized. One company’s “Quick Lock” fin may have a different base from another company’s “click fin” or “flip lock.” Center and side versions can also use different base sizes despite sharing a system name.
Treat these mechanisms as proprietary unless the manufacturer explicitly documents compatibility. If you cannot identify the precise mechanism, send the board model and photographs to the manufacturer or parts seller.
Two-tab surf-style systems
A two-tab fin has two projections at its base. The tabs enter matching plugs or boxes and may be retained by a small grub screw or set screw.
FCS- or Futures-style surf plugs are distinct from a US-style center box. A fin intended for surf plugs does not fit a US box merely because it is marketed for paddle boards. A specialist overview separately identifies US, two-tab, flip-lock, slide-in, hook-and-pin, specialty, and fixed systems and notes that each requires a matching fin. Inflatable Boarder’s fin-system guide explains those distinctions.
Side-fin boxes with set screws
Some side fins slide or press into small boxes and are secured by set screws. The screw heads may be accessible from the side or top of each plug and commonly require a correctly sized hex or Allen key.
Do not assume these boxes match the center box. A board can use a US-style center fin and two entirely different side-fin attachments. Identify each position separately.
Fixed fins
A fixed fin is permanently attached to the board. It has no removable base, track, pin, or lock. A bent, split, detached, or severely damaged fixed fin cannot be replaced through the same procedure as a removable fin.
A detached inflatable fin-box assembly, cracked track, or damage extending into the surrounding board is also a repair issue rather than a routine fin swap. Stop and obtain model-specific manufacturer guidance or a professional repair assessment.
When visual identification remains uncertain, check the original manual, archived product page, manufacturer parts catalog, or model-specific support information. Model year can matter because a manufacturer may change fin systems while retaining a similar board name.
Use a Pre-Purchase Compatibility Checklist
Do not order from one measurement or a product title. Work through the following checklist and retain the information until the replacement has been installed successfully.
Board information
- [ ] Brand
- [ ] Exact model name
- [ ] Model year or approximate purchase year
- [ ] Inflatable or hard construction
- [ ] Serial number or identifying code, if available
- [ ] Photograph of the identification label
- [ ] Original manual or product page, if available
Fin configuration and position
- [ ] One center fin, two fins, 2+1, thruster, or another arrangement
- [ ] Center, left-side, or right-side replacement
- [ ] Number of fins currently present
- [ ] Number of empty fin boxes
- [ ] Whether the manufacturer specifies different side-fin positions
Fin box and base
- [ ] Exact attachment mechanism
- [ ] Base shape and overall dimensions
- [ ] Tab, dowel, hook, or plug arrangement
- [ ] Screw-hole or retaining-slot location
- [ ] Nose-versus-tail locking orientation
- [ ] Correct entry direction for the base
- [ ] Confirmation that the fin is intended for a center or side box
Hardware
- [ ] Screw and plate
- [ ] Hand screw or screwdriver-operated screw
- [ ] Pressure pin
- [ ] Locking tab or catch
- [ ] Flip-lock lever
- [ ] Set or grub screw
- [ ] Required hex key, screwdriver, or fin key
- [ ] Confirmation that the necessary hardware is included or already available
Nominal fin depth—such as 9 inches—describes only one dimension. It does not establish base compatibility. Two 9-inch fins may use different boxes, while a 5-inch side fin may have no way to attach to a center box.
For a US-style box, confirm that the replacement is explicitly intended for that system. Check whether the screw and plate are included. If not, verify that your existing hardware is present, undamaged, and appropriate for the new fin.
Broad claims such as “fits most US boxes” still permit exceptions. Cross-brand US-box fins may work when the box, base, screw position, and hardware are compatible, but “US box” should begin the fit check rather than end it.
For a proprietary lock, choose a replacement approved for the exact board model or documented mechanism. Compare the entry end, locking end, base shape, hardware position, and installation orientation. Similar appearance is not enough.
Screw orientation can matter even within one brand. NIXY states that the screw on its G5 center fin may sit toward the nose or tail depending on the board’s box. It also states that its older 5-inch side fin does not fit the newer G5 center box. NIXY’s model-specific replacement guide documents both distinctions.
If you cannot establish fit confidently, send the seller:
- Your photographs
- Board brand, model, and year
- Fin position
- Base and box measurements
- Photographs of the hardware
- A link to the candidate fin
Ask for written confirmation that the exact product fits the exact board or mechanism. Do not assume that a small mismatch will compress, wear in, or become acceptable during use.
Decide Whether You Need a Center Fin, Side Fin, Set, or Hardware
First identify the board’s configuration:
- Single-fin: One center fin, commonly longer than a side fin.
- 2+1: One longer center fin with two shorter side fins.
- Thruster: Three similarly sized fins, with one centered and two positioned farther forward near the rails.
These terms describe layout, not interchangeability. A missing center fin should not be replaced with a side fin merely because their advertised depths are similar. The bases, orientation, area, and attachment hardware may differ. Pumped Up SUP’s system overview distinguishes single-fin, 2+1, and three-fin thruster arrangements.
When replacing a side fin, check the quantity carefully. “Side fins” may mean a pair, while another listing may be for one piece. Seller snapshots include both two-fin side sets and individual side fins. For example, iROCKER listed one-piece side and river-style fins separately from its center-fin and replacement-lever products. Its collection identified the quantity as one piece.
Complete sets also exist. One Funwater seller snapshot listed a package containing one main fin and two side fins for a groove base at $39.99. The important compatibility phrase is “for groove base”: a complete three-fin package still requires the correct boxes. See the captured Funwater fin-set listing.
Before buying, diagnose which component failed:
| What you find | Likely purchase |
|---|---|
| Fin is missing, but box and hardware are intact | One compatible replacement fin |
| Fin is intact, but screw and plate are lost | Matching screw-and-plate set |
| Slide-in fin is intact, but retaining pin is gone | Correct mechanism-specific pin |
| Fin and base are intact, but the lever is broken | Compatible replacement lever |
| One side fin is missing | One side fin or a pair, depending on availability |
| Multiple fins are damaged or unavailable separately | Compatible complete set |
| Track, box, fixed fin, or surrounding board is damaged | Manufacturer guidance or professional assessment |
A replacement screw-and-plate set or locking lever can cost less than a complete fin. Buy only the failed component when the fin, box, and remaining locking parts are compatible and undamaged. If the catch is worn, the base is deformed, or the box is cracked, replacing the visibly missing part may not resolve the underlying problem.
Keep only clearly identified original parts that remain usable. Store screws, plates, pins, and levers with the relevant board information so that similar-looking components are not mixed accidentally.
Choose Fin Size and Shape for Your Normal Water
If the original fin worked well, replace it with the same model or the closest confirmed like-for-like option. That preserves familiar handling and removes one variable from the purchase.
An 8-to-10-inch center fin is commonly presented as a general-purpose flat-water range, not a universal prescription. The appropriate choice still depends on the board, original configuration, fin shape and area, rider, placement, and water conditions. The specialist sizing guide describes 8–10 inches as a common flat-water center-fin range.
Deeper and larger fins
Manufacturer and specialist guidance generally associates greater fin depth and area with more resistance to sideways tail movement. That tends to favor straight-line tracking and resistance to rolling, but can also mean:
- More drag
- Greater resistance to turning
- Less shallow-water clearance
- More exposure to bottom strikes and submerged obstacles
These are directional rules rather than guaranteed performance results. The effects also depend on the complete board and fin geometry. Do not assume the deepest compatible fin will automatically improve a recreational board.
Shorter and shallow-water fins
A shorter fin generally provides more bottom clearance and easier turning, though it may offer less tracking than a deeper alternative. Profiles commonly marketed for shallow or obstacle-prone water include:
- River fins
- Short, wide fins
- D-shaped fins
- Keel-style fins
- Raked fins
- Flexible fins
A wide, short profile can retain fin area while reducing depth. Flexible material can bend during some contact, but it should not be treated as guaranteed impact protection. Route choice, adequate clearance, and cautious paddling remain more important around rocks, branches, and uncertain bottoms.
General-use, touring, surf, and race shapes
An all-around or dolphin-style fin is a common general-use choice. Touring or pivot-style profiles are commonly oriented toward tracking. Surf and race fins use different combinations of rake, base length, area, flex, and depth, but their effects cannot be separated from the board, rider, placement, and conditions.
The available evidence does not independently establish that a premium carbon fin will produce meaningful benefits for a typical recreational paddler. If the practical need is compatibility and familiar handling, a standard replacement may be the more rational purchase.
Material
Treat material descriptions as broad product positioning rather than performance guarantees:
- Plastic or nylon: Commonly positioned as affordable and durable for routine use.
- Flexible TPU or soft plastic: Designed to bend and frequently marketed for shallow or obstacle-prone water.
- Fiberglass: Commonly marketed as lighter or stiffer than basic plastic.
- Carbon: Marketed as light and stiff, generally at a substantial price premium.
Material alone does not prove speed, safety, durability, or better tracking. Construction quality, geometry, board design, and the type of impact all matter.
Adjustable fore-and-aft position
If the center box allows adjustment, position provides a modest tuning option:
- Farther toward the tail: Generally favors tracking and makes the board more resistant to turning.
- Farther forward: Generally favors maneuverability and a looser turning feel.
These effects are rules of thumb rather than quantified guarantees. Make small changes, secure the hardware, and test one adjustment at a time. Paddle North describes these placement effects while covering several common installation mechanisms.
Understand Replacement Costs and Product Categories
Price check: seller-page snapshots reviewed August 5, 2026. Prices, discounts, stock, shipping, and availability can change. The figures below are comparison examples, not permanent market prices.
| Product category | Practical snapshot range | What to verify |
|---|---|---|
| Small hardware | Under $10 in some listings | Exact screw, plate, pin, or lever compatibility |
| Standard plastic center fin | About $15–$40 | Box, base, hardware, orientation |
| River or shallow-water fin | About $15–$40 | Clearance, base system, intended position |
| Individual side fin or side-fin pair | About $15–$40 | Quantity, position, and base |
| Complete basic fin set | Around $40 in one captured listing | Number of fins and exact box type |
| Specialized carbon fin | More than $80 and, in captured listings, up to $189.99 | Fit, purpose, and whether the premium is justified |
Representative hardware snapshots included a Surftech screw-and-plate set at $5.95 and a complete replacement fin with screw and plate at $30; the complete fin was marked sold out on the captured page. Surftech displayed both products and prices.
The iROCKER snapshot listed a replacement flip-lock lever at $2.99, one-piece side and river-style fins at $15, and a center fin at $29. These prices and the displayed availability controls are volatile and should be checked before purchase.
Standard replacement fins in the supplied seller snapshots commonly appeared from about $19 to $30, while the one-main-plus-two-side groove-base set was listed at $39.99. These examples do not establish compatibility or a universal market rate.
At the upper end, captured carbon race and performance listings ranged from $89 to $189.99. Vermont Ski and Sport displayed an NSP race fin at $99.99, carbon flat-water and rough-water models at $109.99, and some Starboard carbon fins at $179.99 to $189.99. See the retailer’s captured SUP-fin collection.
Price does not resolve compatibility. A $20 exact replacement is more useful than a $150 fin with the wrong base. A sale price, retailer rating, small review count, “universal” label, or current stock status also does not prove fit or performance.
Before comparing totals, check what is included. A low advertised price may omit the screw, plate, pin, or lever required for installation. Conversely, you may not need new hardware if the original parts are undamaged and explicitly compatible.
Use this shopping hierarchy:
- Confirm exact fit.
- Confirm the correct fin position.
- Confirm included hardware.
- Select a size and profile for normal water conditions.
- Consider material.
- Compare the total price, including hardware and shipping.
- Treat ratings and performance language as secondary information.
Install the Replacement Using the Correct Method
Before using any installation method:
- Place the board securely with the underside accessible.
- Inspect the fin box and surrounding material.
- Remove sand, mud, salt residue, and other debris.
- Lay out the fin and all required hardware.
- Confirm which direction is the board’s tail.
- Stop if the box is cracked, detached, or visibly deformed.
The fin’s swept point or curve normally faces toward the tail. Follow model-specific arrows or manufacturer instructions if they indicate a particular orientation.
Screw-and-plate US-style center fin
- Place or slide the small plate into the box track.
- Move the plate toward the appropriate end so it can later align with the fin hole.
- Insert the fin’s tab or dowel through the wider track opening.
- Slide the tab beneath the box rails.
- Lower the other end of the fin base into the track.
- Position the fin as required.
- Align the fin hole directly with the plate.
- Insert the screw and tighten it until snug.
- Do not over-tighten.
Some systems use a hand screw; others require a screwdriver. Use hardware supplied or approved for the system rather than substituting a screw that merely looks similar. Starboard’s illustrated screw-and-washer procedure likewise calls for aligning the hardware with the fin hole and securing it with a screwdriver. See Starboard’s center-fin installation steps.
For removal, a US-box fin generally follows the installation steps in reverse: loosen and remove the screw, lift the screw end of the base, slide the tab to the wider opening, and withdraw the fin. Some US-box screws are designed for hand tightening rather than a screwdriver. Green Water Sports demonstrates both installation and reverse-order removal.
Pressure-fit or quick-release center fin
- Clean and inspect the channel.
- Insert the fin’s dowel or retaining end into the central opening.
- Point the fin toward the tail.
- Slide it into the permitted position.
- Press or snap the locking end into its channel as directed.
- Confirm that the retaining element is fully engaged.
Do not assume every product called “quick-release” uses this sequence. Some have an integrated roller, some use a lever, and others rely on a separate catch.
Slide-in inflatable fin
- Clear the track completely.
- Point the fin rearward.
- Align the base with the track entrance.
- Slide the base fully into place.
- Align the retaining slots.
- Insert the pressure pin or close the locking tab.
- Confirm that the retaining part is fully seated.
If the base stops unexpectedly, withdraw it and inspect the track. Do not use impact tools or excessive pressure to overcome debris or a mismatched rail profile.
Bluefin Smart Lock example
Bluefin’s Smart Lock procedure is brand-specific:
- Clean the box.
- Engage the front of the fin first.
- Slide the fin forward.
- Lower the rear into place.
- Press the locking catch.
This is one proprietary click-style mechanism, not a universal procedure for every locking fin. Bluefin identifies front and rear notches and a catch at the back of its box. Its Smart Lock installation guide shows the sequence.
Side fins held by set screws
- Identify the correct fin and position according to the board instructions.
- Loosen the set screws with the correct hex or Allen key.
- Insert each fin into its matching plugs or box.
- Point the fins in the orientation specified for the board.
- Seat each base fully.
- Retighten the set screws without excessive force.
Do not continue turning a screw that appears cross-threaded or fails to contact the fin correctly. Remove the fin, inspect the alignment, and begin again.
Final hand check
Before launching, confirm:
- The fin points toward the tail or follows the manufacturer’s specified orientation.
- The base is completely seated.
- The screw, plate, pin, catch, tab, or lever is present.
- The hardware is snug but not over-tightened.
- The fin does not shift obviously during a hand check.
- The box and surrounding board show no visible damage.
Do not invent an acceptable wobble tolerance. If movement remains and the manufacturer does not define what is normal for that mechanism, stop and ask for model-specific guidance before using the board.
Troubleshoot Poor Fit, Wobble, and Fin-Box Damage
A fin that does not install smoothly is providing diagnostic information. Stop and identify the cause rather than applying more force.
| Symptom | Possible causes | What to do |
|---|---|---|
| Fin will not enter the track | Debris, reversed entry direction, incompatible base, deformed track | Remove the fin, clean the track, confirm orientation, and compare the replacement with the original |
| Fin enters partway and stops | Debris, rail mismatch, wrong base length or shape | Withdraw and inspect it; do not strike, trim, or force it |
| Screw and plate will not align | Plate in wrong position, fin not seated, incorrect orientation | Reposition the plate and align it directly beneath the hole |
| Lock or lever will not close | Incomplete seating, debris, reversed fin, mismatched mechanism, damaged catch | Clean and reseat the fin; compare the mechanism with model-specific instructions |
| Fin points forward | Reversed fin or wrong entry direction | Remove and reinstall it in the specified rearward orientation |
| Fin sits crooked | Base not seated, debris beneath it, wrong fin, damaged box | Remove, clean, and inspect the base and box |
| Fin moves after installation | Missing or loose hardware, pin not engaged, base not seated, worn catch or box | Confirm that every part is present and snug; seek model-specific guidance if movement remains |
| Box or surrounding board appears cracked, detached, or deformed | Damaged fitting, track, or board structure | Stop and obtain manufacturer or professional assessment |
For screw-and-plate misalignment, do not tighten the screw at an angle to pull the parts together. Move the plate until it sits directly beneath the fin hole. Confirm that the tab is captured correctly and the base is level.
For a lock that refuses to close, check four things:
- Is sand or other debris inside or beneath the lock?
- Is the fin fully seated?
- Is the fin reversed?
- Does the base match this exact locking mechanism?
A broken catch, distorted pin slot, or worn lever may let a fin appear installed without retaining it securely. Replace an individual component only after confirming that the box and fin base remain compatible and undamaged.
A cracked or deformed track, detached inflatable-board fitting, damaged fixed fin, or damage extending into the board is not a routine fin replacement. Do not attempt to compensate with a tighter screw, an altered fin, or an unapproved adhesive repair. Fin-box replacement—particularly on an inflatable—is described as a professional repair rather than an ordinary parts swap. Glide recommends professional attention for fin-box replacement.
After a successful installation, perform a cautious handling check close to shore in calm, uncrowded conditions. Confirm that the board tracks and turns predictably before returning to wind, waves, current, deep water, or busy areas.
Do not resume ordinary paddling without a fin that the board requires. A fin limits sideways movement of the tail and contributes to straight-line tracking; Bluefin specifically advises against paddling without one. Its fin guidance explains the resulting change in tail movement and tracking.
Paddle Board Fin Replacement FAQ
Are paddle board fins universal?
No. Paddle boards use US-style tracks, slide-in bases, proprietary locks, hook-and-pin attachments, two-tab plugs, set-screw side boxes, and fixed fins. Compatibility depends on the actual box, base, hardware, orientation, and fin position.
Even “universal” normally means compatibility with a named standard or product family—not every paddle board. Verify the board model and mechanism before buying.
Will any US-box fin fit my paddle board?
Not automatically. A US-style box offers broad aftermarket choice, but you still need to confirm that the fin is intended for that box, the base seats correctly, the screw hole can align with the plate, and the correct hardware is available.
“Fits most US boxes” allows for exceptions. Compare the seller’s specifications and photographs with the original fin and box, and request confirmation if anything differs.
What size replacement fin should I buy for flat water or shallow water?
For recreational flat water, an 8-to-10-inch compatible center fin is a commonly cited range, but matching the original remains the safest starting point. A deeper or larger fin generally favors tracking while increasing turning resistance and bottom-strike exposure.
For shallow or obstacle-prone water, consider a compatible shorter, wider, D-shaped, keel-style, river, raked, or flexible fin. Choose by box compatibility first and water conditions second. Depth alone does not determine fit or handling.
Can I replace only a lost screw, plate, pin, lever, or side fin?
Often, yes. Sellers offer screw-and-plate sets, locking levers, individual side fins, side-fin pairs, and complete sets. Replace only the failed component when the fin, box, and remaining locking parts are compatible and undamaged.
Check quantities carefully: a side-fin product may contain one fin or a pair. Pins, catches, and levers should be treated as model- or mechanism-specific unless cross-compatibility is explicitly documented.
Why will my replacement fin not slide into the box or lock in place?
Common causes include debris, reversed orientation, incomplete seating, a misaligned screw plate, missing hardware, a mismatched base, or a damaged catch or track.
Remove the fin and compare it with the original. Clean the box, verify the entry direction and locking orientation, and confirm that every required component is present. Do not force or modify the replacement. If fit remains uncertain—or the box or surrounding board appears damaged—contact the manufacturer, seller, or a qualified repair professional.
Purchase-and-launch checklist
- [ ] Identify the exact fin box and the missing fin’s position.
- [ ] Match the original attachment mechanism, base, orientation, and hardware.
- [ ] Confirm fit for the board model or exact locking system.
- [ ] Change size or shape only for a defined water or handling need.
- [ ] Clean the box and install the fin according to its mechanism.
- [ ] Check seating, orientation, hardware, and movement by hand.
- [ ] Test cautiously near shore before normal paddling.
- [ ] Stop and seek qualified guidance if fit remains uncertain or the box is damaged.