
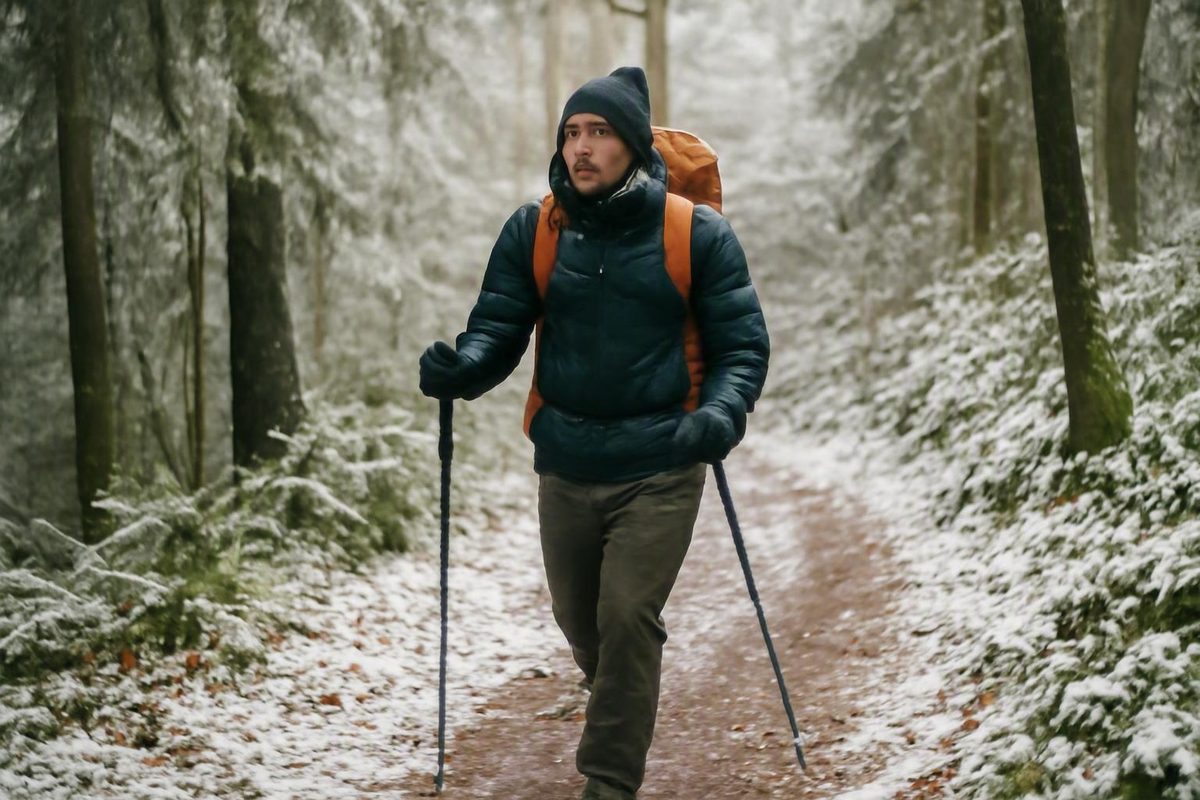
Winter hiking gear should be chosen from the conditions backward. A sheltered woodland walk in light snow does not require the same equipment as a deep-snow route, an exposed ridge, or a trail covered in hard ice. Temperature matters, but so do wind, precipitation, snow depth, surface hardness, slope, daylight, remoteness, fall consequences, and the experience of the group.
This guide is an evidence-based planning framework for nontechnical winter day hiking. It is not a complete overnight, mountaineering, avalanche-travel, or wilderness-medicine system. It does not provide operational instruction for ice-axe use, technical crampon travel, avalanche rescue, or treatment of serious cold injury. Those subjects require qualified instruction and practiced skills.
Conditions also vary by region. Advice developed for northeastern mountain winters should not be transferred unchanged to California, the Sierra Nevada, the Pacific Northwest, or a mild urban winter walk. Use official land-manager notices, elevation-specific forecasts, road and access reports, current trail information, and the applicable regional avalanche center when relevant.
The quick winter day-hiking checklist
Use this checklist as a planning framework, not a universal packing mandate. Winter hiking generally requires more preparation, time, caution, and emergency margin than comparable mild-weather hiking, but the exact kit must reflect the route and current conditions. The Appalachian Mountain Club likewise frames its winter hiking guidance around terrain, conditions, and the ability to withstand an injury or delay.
Wear these core clothing items
- Non-cotton base layers: A wool or synthetic top and, when conditions warrant, long-underwear bottoms.
- Adjustable active insulation: Fleece, wool, synthetic insulation, or another breathable layer that can be removed or vented.
- Wind- and weather-resistant shell: A hooded outer layer that fits over insulation and provides protection appropriate to the expected wind and precipitation.
- Winter-appropriate pants: Breathable hiking or softshell pants, often combined with non-cotton long underwear.
- Non-cotton socks: Wool or synthetic socks that do not make the boots tight.
- Suitable boots: Insulated and water-resistant enough for the route, with secure heel hold, toe room, and compatibility with planned traction.
- Hat: Wool or synthetic, preferably covering the ears.
- Hand protection: Lighter gloves for movement and dexterity, plus warmer wind- and water-resistant gloves or mittens.
Carry personal essentials
What must remain with each person depends on the route, separation plan, group competence, and consequences of losing access to shared equipment. As a starting point, each hiker should normally have personal clothing, food, water, light, essential medication, and a means of signaling. The group should then make an explicit plan for navigation, shelter, first aid, repair, and other emergency capabilities rather than assuming one pack will always remain accessible.
Personal equipment commonly includes:
- Spare insulation, ideally a warm hooded puffy or parka
- Spare dry gloves or mittens
- Spare dry socks
- Water in cold-resistant storage
- High-energy food that remains edible when cold
- Headlamp with fresh batteries
- Spare batteries protected from the cold
- Personal first-aid supplies and medication
- Whistle
- Emergency bivy or blanket
- Sunscreen and sunglasses
- Phone or other communication device where useful
The group must also ensure access to:
- Paper map and compass
- Electronic navigation, if used
- Fire-starting supplies where lawful and potentially useful
- Knife or multi-tool
- Basic repair materials
- Sufficient emergency shelter and insulation
This distinction avoids two unsafe assumptions: that every heavy item must always be duplicated, or that one person can carry everything needed by the entire group. Institutional winter day-hike guidance includes spare insulation, navigation, lighting, first aid, emergency shelter, repair equipment, food, and water, while also emphasizing that equipment must be tested and adjusted before the trip.
Add these when conditions require them
These are not automatic requirements for every winter outing:
-
Gaiters: For loose, deep, or windblown snow that could enter boots
-
Microspikes: For packed snow, intermittent ice, and relatively low-angle nontechnical trails
- Snowshoes: For deep or unconsolidated snow where flotation is needed
- Technical mountaineering crampons: For trained users on steeper hard snow or ice
- Goggles: For strong wind, blowing snow, spindrift, or exposed terrain
- Shell pants: For significant wind, wet snow, rain, or prolonged contact with snow
- Foam pad: For extended stops and insulation from snow or frozen ground
- Hand or toe warmers: As supplemental comfort items, not substitutes for suitable clothing
Consider group contingency equipment
A competent group may deliberately divide heavier equipment according to remoteness, weather, evacuation difficulty, and the possibility of an unplanned delay:
- Expanded first-aid supplies
- Sleeping bag
- Full-length insulated pad
- More protective shelter
- Stove, fuel, and pot
- Additional fire-starting supplies
- Larger repair kit
- Satellite communication device
Shared equipment requires an explicit plan. Consider what happens if the group separates, one pack is lost, or the person carrying a critical item becomes injured.
Treat these as training-required tools
- Ice axe
- Technical mountaineering crampons
- Avalanche transceiver
- Avalanche shovel
- Avalanche probe
- Ropes and climbing protection
These tools belong to specialized systems. An ice axe is not a substitute for practiced movement and arrest skills. Avalanche-rescue equipment does not make avalanche terrain safe without forecasting knowledge, terrain recognition, route selection, companion-rescue practice, and sound judgment.
Choose gear from the conditions backward
Winter magnifies small planning errors. Cold makes wet clothing and long stops more consequential. Short daylight can turn a delayed return into night navigation. An injury that would be manageable near a summer trailhead can leave someone stationary in cold wind or precipitation.
Before selecting equipment, build a route profile around these questions:
- Temperature: What temperatures are expected at the trailhead, along the route, and after sunset?
- Wind: Is the route sheltered, or does it cross open slopes, ridges, or summits?
- Precipitation: Could there be rain, freezing rain, wet snow, or dry snow?
- Snow depth: Is the ground bare, lightly covered, packed, or deeply buried?
- Surface hardness: Will you encounter soft snow, refrozen tracks, hard snow, or sheet ice?
- Slope: Is the route low-angle, steep, traversing, or exposed above a drop?
- Elevation: How much colder, windier, or snowier could it be above the trailhead?
- Exposure: Will trees provide shelter, or will the group be directly exposed?
- Duration: How long should the trip take, and how much slower could winter travel be?
- Remoteness: How quickly could the group reach shelter, a road, or assistance?
- Forecast change: What happens if wind, precipitation, or falling temperature arrives early?
- Group readiness: Can the least-prepared person maintain the pace, use the equipment, and remain warm during a delay?
Use the answers to revise the route as well as the packing list. If the forecast or surface conditions demand equipment and skills the group does not have, choose an easier objective.
For destination-specific planning, consult the official land manager for closures and access restrictions, an elevation-appropriate weather service, current road information, and recent trail reports. Before approaching possible avalanche terrain, consult the applicable regional avalanche center. General gear articles cannot determine whether a specific slope is safe.
Profile 1: A sheltered cold trail
On a forested, nontechnical trail with little snow and limited exposure, prioritize:
- Adjustable base, insulating, and shell layers
- Warm spare insulation for stops
- Navigation, lighting, food, water, first aid, signaling, and emergency shelter
- Boots suitable for the expected cold and moisture
- Traction only if current surfaces require it
Do not add technical equipment merely because the calendar says winter. Confirm whether the trail is bare, muddy, snowy, packed, or icy.
Profile 2: A packed-snow or low-angle icy trail
For a maintained trail with compacted snow or intermittent ice:
- Add microspikes that fit the exact boots
- Consider trekking poles for balance
- Determine whether ice continues onto steeper or more consequential terrain
- Carry stationary insulation in case difficult footing delays the return
Microspikes can improve grip on suitable surfaces, but they do not remove fall consequences. If ice becomes substantially steeper, harder, or more exposed than expected, turn around rather than assuming lightweight traction makes the route safe.
Profile 3: A deep-snow route
For deep, unconsolidated snow:
- Prioritize properly fitted snowshoes with integrated traction
- Add gaiters to reduce snow entry
- Use poles with snow baskets when useful
- Expect slower movement and greater effort
- Increase daylight and emergency margins
- Ensure the pack can carry snowshoes securely if surfaces change
Microspikes provide traction rather than flotation. Repeatedly sinking into deep snow can drastically reduce speed and tire the group even when the planned distance appears modest.
Profile 4: An exposed or technical route
An exposed ridge, steep hard snow, technical ice, or avalanche terrain is not an ordinary hike with extra products. These environments require specialized route judgment, current forecasts, compatible tools, instruction, and practice. Winter guidance for above-treeline travel similarly warns that specialized equipment is ineffective without the relevant knowledge and experience.
Do not use a packing checklist as operational instruction for climbing or avalanche travel. If a route requires an ice axe, technical crampons, or avalanche-rescue equipment and the group cannot use the complete system competently, choose a nontechnical route or obtain qualified instruction.
For every profile:
- Check current weather, access, and trail information.
- Review regional avalanche information where applicable.
- Begin with margin for shorter daylight and slower travel.
- Leave the route, vehicle location, expected return time, and alarm plan with someone not on the trip.
- Establish a turnaround time.
- Cancel or turn around when conditions materially differ from the plan.
Layer for movement, stops, and changing weather
A useful winter clothing system has three functions:
- Base layer: Moves perspiration away from the skin.
- Middle layer: Supplies insulation.
- Outer shell: Reduces exposure to wind and precipitation.
This is a functional model, not an instruction to wear every garment continuously. Layering works only when clothing is added, removed, or vented as exertion and conditions change; fixed outfits based only on air temperature overlook pace and personal metabolism. REI’s layering guidance explains these three functions and the need for active adjustment.
Manage layers before you become soaked
Make clothing changes proactively:
- Avoid starting so bundled that the first climb causes heavy sweating.
- Before sustained uphill travel, open vents or remove excess insulation.
- If perspiration builds, adjust layers or reduce the pace.
- Before a break, add insulation while still warm.
- Add wind and weather protection before entering an exposed area.
- Replace insulation before a long descent, when heat production may fall.
- Keep dry emergency clothing protected inside the pack.
The goal is not to eliminate every trace of perspiration. It is to limit avoidable moisture accumulation that can chill you when movement slows.
Separate active insulation from stop insulation
The layer that works while climbing may be inadequate when you stop. Active insulation balances warmth and breathability during movement. A larger hooded puffy or parka is intended for lunch stops, equipment repairs, an injury response, a navigation delay, or another low-output period.
The stop layer should:
- Fit over the clothing already being worn
- Cover the torso well
- Have a functional hood
- Be accessible without unloading the entire pack
- Provide a meaningful increase in warmth during an extended stop
No jacket guarantees safety during an unknown delay. Spare insulation improves the group’s ability to manage one, but it does not replace conservative route choice or timely evacuation.
Choose base-layer materials for moisture management
Wool and synthetic fabrics are generally preferable to cotton. Cotton absorbs moisture and dries slowly, which can leave the wearer damp and chilled when activity decreases. This applies to shirts, underwear, socks, sweatshirts, and other next-to-skin clothing.
A heavier base layer is not automatically better. During strenuous movement, it can create excess warmth and contribute to moisture buildup. Choose its weight according to expected exertion, wind, personal metabolism, and the rest of the system.
Compare middle-layer options by tradeoff
Fleece
- Breathable and fast-drying
- Useful during active movement
- Retains some insulating function when damp
- Offers limited wind protection
- Can be bulky for its warmth
Down insulation
- Light and compressible
- Useful as a carried stop layer in dry conditions
- Loses insulating efficiency when wet
- Requires careful moisture protection
Synthetic insulation
- More forgiving in damp conditions
- Practical for variable precipitation
- Generally bulkier and less compressible than comparable down
- Still requires protection from prolonged saturation
There is no universal winner. A breathable fleece may be more comfortable during a climb, while down or synthetic insulation may be more useful during stationary periods.
Fit the shell over the system
A shell should fit over intended insulation without compressing it or restricting movement. Choose protection according to actual exposure: a sheltered dry trail may require less than a windy route with wet snow.
Useful shell features can include:
- Adjustable hood
- Closures that help exclude wind and precipitation
- Cuffs that integrate with gloves
- Adjustable hem
- Ventilation zippers
- Pockets accessible while wearing a pack
Waterproof protection can also trap heat and perspiration. Vent early rather than waiting until the inside is wet.
Build the lower-body system deliberately
Possible components include:
- Non-cotton long underwear
- Breathable hiking pants
- Softshell pants for mobility and wind resistance
- Wind pants
- Waterproof shell pants
- Insulated pants for unusually cold or stationary use
Softshell pants can work well during active movement but are not substitutes for waterproof protection in prolonged rain or wet snow. Shell pants become more useful with strong wind, precipitation, exposed travel, or repeated contact with snow.
Avoid rigid “wear this at this temperature” formulas. Wind, moisture, sunlight, pace, circulation, exertion, and time spent stationary can make the same air temperature feel very different.
Protect feet, hands, head, and face
Extremity systems must preserve warmth without creating restrictive pressure. Thick, tight, or poorly integrated gear may perform worse than a carefully fitted system.
Choose winter boots as part of a system
Evaluate boots for:
- Insulation suitable for the expected cold
- Water resistance appropriate to snow and slush
- Secure heel hold
- Enough toe room for movement
- Fit with the intended socks
- Space that does not compress the foot
- Grip appropriate to the approach
- Compatibility with planned traction
- Comfort while climbing, flexing, and descending
Do not rely on one advertised temperature rating. Foot warmth also depends on circulation, moisture, exertion, wind, personal physiology, and time spent stationary.
Thick socks do not automatically make feet warmer. If they make the boot tight, circulation can be reduced. Cold-weather guidance warns that tight boots, gaiters, glove cuffs, and watchbands can impair circulation and increase cold-injury risk.
Wear wool or synthetic socks and carry a dry spare pair. Choose thickness according to fit and conditions rather than assuming the thickest sock is best.
Use gaiters without constriction
Check that they:
- Seal reasonably around the boot
- Do not interfere with traction bindings
- Allow full ankle movement
- Do not compress the calf
- Remain secure while walking
- Can be adjusted while wearing gloves
Apply the same circulation check to boot laces, sock cuffs, glove gauntlets, watchbands, and anything else that tightens around an extremity.
Build a layered hand system
A flexible hand system may include:
- A liner or light glove for handling equipment
- A warmer wind- and water-resistant glove or mitten
- A dry spare protected inside the pack
Gloves generally provide more finger dexterity. Mittens keep fingers together and may provide more warmth but reduce fine control. Neither is universally superior. The system should allow you to navigate, open food, adjust traction, and operate zippers without prolonged bare-hand exposure.
Cover the head, ears, neck, and face
Carry protection appropriate to conditions:
- Wool or synthetic hat covering the ears
- Neck gaiter, scarf, balaclava, or equivalent
- Additional face coverage for strong wind or blowing snow
- Sunglasses for snow glare
- Goggles when wind, spindrift, or visibility warrants them
- Sunscreen for exposed skin
Test whether face protection causes glasses or goggles to fog. Confirm that the hood turns with your head without blocking peripheral vision.
Perform an at-home fit audit
Before the trip:
- Put on the exact socks you intend to wear.
- Lace the boots as you would on the trail.
- Walk, climb stairs, flex forward, and simulate descending.
- Confirm that toes can move and do not strike the front.
- Check heel security without painful pressure.
- Attach gaiters and reassess circulation and movement.
- Install every planned traction device.
- Check whether bindings remain secure when the boot flexes.
- Repeat adjustments while wearing gloves.
A component that fits in isolation may fail when combined with socks, gaiters, traction, and winter pants.
Microspikes, snowshoes, or crampons: match traction to terrain
Traction selection requires more than reading a trail’s steepness. Consider surface hardness, snow depth, exposure, potential fall consequences, boot compatibility, current conditions, and user skill.
| Device | Typical surface | Snow depth | Slope or terrain | Primary function | Boot compatibility | Skill requirement | Major limitation |
|---|---|---|---|---|---|---|---|
| Microspikes | Packed snow and icy patches | Shallow or packed | Relatively low-angle, nontechnical trails | Slip resistance | Flexible harness must fit the exact boot | Correct fitting and careful walking practice | No flotation; not a substitute for technical crampons |
| Snowshoes | Soft, deep, or unconsolidated snow | Moderate to deep | Nontechnical snowy terrain suited to the model | Flotation plus integrated traction | Binding must hold the boot securely | Practice with stride, turns, slopes, and bindings | Bulky and inefficient on bare ground or hard ice |
| Technical mountaineering crampons | Hard snow or ice | Surface hardness matters more than depth | Steeper or technical terrain | Penetrating traction on firm surfaces | Boot and binding must be compatible | Instruction, fitting, and practiced movement | No flotation; unfamiliar use can create additional hazards |
| Lightweight coil-style traction | Intermittent slick surfaces | Minimal | Easy, low-consequence terrain | Modest grip improvement | Product-specific | Basic fitting and use | Not equivalent to microspikes or mountaineering crampons |
Institutional winter-hiking guidance distinguishes snowshoes, microspikes, and full crampons by snow depth, hardness, and terrain, and states that crampons must be fitted to the boots before departure.
When microspikes make sense
Consider microspikes when:
- The trail is predominantly packed snow
- Icy patches interrupt otherwise straightforward travel
- Terrain remains relatively low-angle and nontechnical
- A slip is unlikely to become an uncontrolled, consequential fall
- The harness remains secure on the intended boots
They do not keep a hiker on top of deep powder. They also do not transform steep hard snow or technical ice into ordinary hiking terrain.
When snowshoes make sense
Use snowshoes when unconsolidated snow is deep enough that ordinary boots sink substantially. Integrated traction is important when the route includes snowy climbs or descents.
Selection depends on factors such as:
- User and pack weight
- Snow characteristics
- Terrain
- Binding compatibility
- Maneuverability
- Climbing features
- Ability to attach the snowshoes securely to a pack
Practice before a long outing. Walking, turning, crossing uneven ground, and descending all feel different in snowshoes.
When technical crampons enter the picture
Technical mountaineering crampons are associated with steeper hard snow or ice. Safe use depends on compatible boots and bindings, correct fitting, terrain judgment, and practiced movement.
If a route requires technical crampons or an ice axe, it has moved beyond a simple gear-selection question. Obtain appropriate instruction rather than attempting to learn operational techniques from a checklist.
Test traction before departure
For every device:
- Fit it to the exact boots you will wear.
- Inspect the harness, straps, chains, points, and bindings.
- Check that nothing conflicts with gaiters.
- Walk and flex the boot.
- Practice installation and removal while wearing gloves.
- Look for cracks, stretching, corrosion, loose hardware, or worn points.
- Carry traction where it can be reached before entering hazardous ground.
Evaluate the construction, binding, intended surface, required skill, and consequences of a fall—not only the product name.
Pack water, food, lighting, and cold-sensitive electronics
Winter systems must remain usable after hours in freezing conditions. A bottle that cannot be opened, food that has frozen solid, or a headlamp with exhausted batteries is functionally unavailable.
Carry sufficient water with a contingency margin
Water needs vary with route length, exertion, temperature, individual physiology, and possible delay. Carry enough for the plan plus a reasonable contingency margin rather than relying on one universal quantity.
Insulated wide-mouth bottles are often more dependable than exposed hydration hoses in freezing conditions. Useful tactics include:
- Insulate bottles.
- Store them inside the pack rather than in an exposed outer pocket.
- Use leakproof containers.
- Carry leakproof bottles upside down so ice is less likely to block the opening.
- Check lids periodically.
- Keep at least one bottle accessible enough that drinking is not postponed.
Understand hydration-reservoir limits
A reservoir may remain usable if you:
- Insulate the hose
- Sip frequently
- Clear water from the tube after drinking
- Protect exposed components
- Keep the bite valve from remaining full of water
These measures are not guarantees. Tubes and valves may still freeze in severe cold, so an exposed hose should not be the only water option when access is critical. The same cold-weather guidance that describes these measures also notes the limits of reservoirs and recommends insulated bottles in very cold conditions.
Pack food that works while cold
Choose food that:
- Remains chewable at low temperatures
- Can be opened while wearing gloves
- Requires little or no preparation
- Can be eaten in small amounts
- Provides concentrated energy
- Includes a reserve for delays
Test unfamiliar food by chilling it at home. Some bars and candies become difficult to bite, while elaborate meals may take too long to prepare. There is no universal winter calorie formula, but exertion and possible delays justify carrying adequate high-energy food plus a reserve.
Protect batteries and electronics
Cold can reduce battery performance. Keep a phone and spare batteries protected and warm when practical, such as in an inner pocket or insulated pouch. Do not assume one phone can continuously provide navigation, communication, photography, and emergency lighting throughout a cold day.
Carry a headlamp even for a planned daylight trip. Winter movement can be slower and available daylight shorter than expected. Pack fresh batteries or a fully charged lamp, plus compatible backup batteries or power.
Before departure:
- Download maps required for offline use.
- Place the phone in a protective case or bag.
- Reduce unnecessary battery use.
- Confirm that the headlamp works with gloves on.
- Keep spare batteries dry.
- Carry a paper map and compass independently of electronics.
Carry the equipment that makes a delay more manageable
A winter emergency kit creates capabilities; it does not guarantee survival. For each item, ask what problem it addresses and whether it can be deployed with cold hands, limited light, and poor weather.
| Capability | Equipment | Intended use |
|---|---|---|
| Navigation | Paper map, compass, electronic map or GPS | Maintain or recover the route when signs and tracks are obscured |
| Communication and signaling | Phone, satellite communicator where appropriate, whistle | Request help or attract attention |
| Lighting | Headlamp and spare batteries | Navigate, assess injuries, or deploy shelter after dark |
| First aid | Personal supplies and required medication | Address manageable injuries and support evacuation |
| Insulation | Hooded puffy or parka, spare gloves, socks, and hat | Reduce heat loss when movement stops |
| Shelter | Emergency bivy, blanket, or compact shelter | Reduce exposure to wind and precipitation |
| Ground insulation | Closed-cell foam pad | Reduce conductive heat loss to snow or frozen ground |
| Conditional fire capability | Lighter, waterproof matches, and tinder | Attempt a fire only where conditions, fuel, skill, and regulations permit |
| Repair | Tape, cord, fasteners, repair sleeves, and multi-tool | Address damaged bindings, clothing, or equipment |
| Food | Ready-to-eat food plus reserve | Support continued movement or an unexpected delay |
| Water | Insulated bottles and contingency supply | Maintain access to water despite freezing conditions |
A fire cannot be assumed to work in wet, windy, fuel-poor, or restricted settings. Emergency insulation and shelter should not depend on successfully starting one.
A paper map and compass belong alongside electronic navigation, but ownership is not competence. Practice orienting the map, identifying terrain, taking a bearing, and returning to a known point before relying on those skills in snowfall or darkness.
Carry insulation for being stationary
Plan for a period when normal movement cannot generate sufficient heat. Spare insulation may be needed during:
- A lunch stop
- A navigation problem
- Equipment repair
- Assistance to another hiker
- An injury
- An unexpectedly long wait
A hooded puffy or parka should fit over active clothing. Spare gloves, socks, and a hat provide options if worn items become wet. Protect emergency clothing in a waterproof pack liner or dry bag. Winter day-hike checklists similarly recommend enough additional insulation to remain warmer during an extended stop.
Add a barrier from the ground
A compact closed-cell foam pad provides a useful barrier during a prolonged stop, first-aid response, or emergency bivouac. It can also make ordinary breaks more comfortable, making hikers more likely to use their insulation promptly.
Scale overnight contingency equipment to the route
A local trail near roads and shelter may justify a compact emergency bivy and foam pad. A remote route, severe forecast, or difficult evacuation may justify:
- Sleeping bag
- Full-length insulated pad
- Bivy or tent
- Stove, fuel, and pot
- More substantial repair supplies
- Expanded first-aid equipment
These items are route- and group-dependent rather than mandatory for every local day hike. A competent group can divide selected heavier equipment deliberately, but it must account for separation, loss, injury, and access to critical items.
Know the limits of gear: cold injury and technical terrain
Cold-injury information should be used for early recognition and conservative response. It is not a substitute for professional medical care, emergency advice, or wilderness-medicine training.
Possible frostbite signs
Frostbite commonly affects exposed or poorly perfused areas such as fingers, toes, ears, and the nose. Possible signs include:
- Unusually cold skin
- Pale or waxy appearance
- Tingling
- Numbness
- Pain
- Changes in tissue firmness
Severity can be difficult to determine while tissue remains frozen. Do not rub frozen tissue, place it under hot running water, or thaw it when refreezing remains possible. Blistering after warming may indicate a more serious injury and warrants prompt medical evaluation. These recognition and response limits are described in cold-injury guidance reviewed by NOLS Wilderness Medicine education staff.
Possible hypothermia signs
Early indicators may include:
- Shivering
- Minor clumsiness
- Slow thinking
- Confusion
- Mood or behavior changes
More serious warning signs include:
- Impaired coordination
- Obvious changes in mental status
- Worsening confusion
- Inability to participate reliably in self-care
- Cessation of shivering despite continued cold exposure
Confusion and impaired judgment can prevent an affected person from recognizing the danger. Do not rely on that person alone to decide whether the group should continue.
Immediate priorities are to:
- Move out of wind and precipitation where possible.
- Replace wet clothing with dry layers.
- Shelter and insulate the person from cold air and the ground.
- Begin evacuation when symptoms are more than mild or are worsening.
- Seek professional medical care.
Impaired coordination, marked mental-status changes, worsening confusion, or cessation of shivering require prompt evacuation and professional care. Do not assume that a warm drink or one additional jacket resolves a serious case.
Recognize where ordinary winter hiking ends
Ordinary winter day hiking does not automatically include:
- Steep hard-snow climbing
- Technical ice
- Exposed mountaineering
- Glacier travel
- Avalanche terrain
- Routes where an uncontrolled fall would have severe consequences
Technical crampons and ice axes require compatible equipment, fitting, instruction, and repeated practice. Avalanche transceivers, shovels, and probes are partner-rescue tools rather than protective shields. They cannot replace a current avalanche forecast, terrain selection, avoidance decisions, companion-rescue practice, and formal education. Beginner winter-mountain guidance likewise separates these technical systems from ordinary hiking equipment.
If the safety plan depends on using unfamiliar technical equipment correctly for the first time, select a different route.
Run a final fit, function, and turnaround check
Complete this check the night before rather than discovering incompatibilities at the trailhead.
Review the plan
- Check the latest elevation-appropriate weather forecast.
- Review official access, road, closure, trail, snow, and ice information.
- Check the applicable regional avalanche forecast where relevant.
- Confirm distance, elevation change, terrain, and escape options.
- Set a turnaround time.
- Account for available daylight.
- Add margin for snow, traction changes, and group pace.
- Leave the route and expected return time with another person.
- Explain when that person should raise an alarm and whom to contact.
Test the complete footwear system
Combine and test:
- Intended socks
- Boots
- Gaiters
- Microspikes
- Snowshoe bindings
- Technical crampons, only when appropriate to the route and training
Do not assess each item separately. Confirm toe movement, heel security, circulation, binding retention, gaiter clearance, and comfort while walking and flexing.
Practice with gloves on
Practice:
- Adding and removing layers
- Opening vents and adjusting hoods
- Installing and removing traction
- Reading the map
- Taking and following a compass bearing
- Operating the headlamp
- Accessing bottles and food
- Opening the first-aid kit
- Using the whistle
- Deploying the emergency bivy or shelter
- Accessing repair equipment
If an essential task requires bare hands for several minutes, revise the system or practice until it can be performed more efficiently.
Inspect consumables and storage
- Confirm that spare clothing is dry and waterproofed.
- Check that bottles are insulated and leakproof.
- Make sure food remains edible when cold.
- Charge electronics.
- Install fresh headlamp batteries.
- Pack backup batteries or power.
- Keep fire-starting materials dry.
- Check first-aid supplies and personal medication.
- Inspect traction attachment points and wear.
- Confirm that the pack closes without crushing or omitting emergency insulation.
The pack needs room for layers removed during exertion. If a shell or mid-layer cannot be stowed, a hiker may wear too much, accumulate unnecessary moisture, or leave essential insulation behind.
Reconsider or turn around when the plan stops matching reality
Turn around early if:
- Wind or precipitation is stronger than forecast.
- Snow is deeper or surfaces are harder than expected.
- Ice continues onto terrain beyond the group’s equipment or skill.
- Visibility deteriorates.
- Pace threatens the daylight margin.
- Boots, bindings, or traction repeatedly fail.
- Clothing becomes persistently wet.
- A group member cannot remain warm.
- Navigation becomes uncertain.
- The least-prepared person is struggling.
- The route unexpectedly enters technical or avalanche terrain.
Turning around is a normal route-management decision, not a failure. More equipment cannot compensate for a hazardous forecast, unstable or unfamiliar conditions, incompatible gear, inadequate skill, poor visibility, or unwillingness to retreat.
Frequently asked questions
Why is cotton unsuitable for winter hiking?
Cotton absorbs moisture and dries slowly. Sweat, melting snow, or precipitation can therefore leave cotton garments damp against the body and contribute to chilling when activity slows.
Wool and synthetic fabrics generally manage moisture and dry faster, making them more useful for base layers, underwear, socks, and active insulation.
Do I need microspikes or snowshoes for a winter hike?
Not necessarily. Consider microspikes for packed snow or relatively low-angle icy trails when the device fits the boots and the terrain remains nontechnical. Use snowshoes when deep or unconsolidated snow requires flotation. A dry or lightly snowy sheltered trail may require neither.
Check current conditions rather than choosing solely by season. Deep snow, hard ice, packed trail, and bare ground can exist on different parts of the same route. A general equipment overview also distinguishes microspikes, snowshoes, and crampons by surface and terrain rather than treating them as interchangeable.
How much extra clothing should I carry on a winter day hike?
Carry dry insulation intended for an extended stationary period, not only what is comfortable during continuous walking. A practical reserve may include a hooded puffy or parka that fits over active clothing, spare gloves or mittens, spare socks, and an additional hat or dry base layer.
The exact amount depends on temperature, wind, precipitation, remoteness, trip duration, and evacuation difficulty. A short sheltered route near roads may require less than a remote exposed route, but neither clothing nor emergency equipment guarantees a safe outcome during an indefinite delay.
Can I use a hydration bladder in freezing weather?
Yes, but it can be less dependable than a well-insulated bottle because the hose, bite valve, or exposed water may freeze. Insulating the tube, sipping frequently, and clearing water from the hose can help, but these measures are not guarantees in severe cold.
If you use a reservoir, consider an insulated wide-mouth bottle as an independent backup. Keep bottles inside the pack when practical and carry leakproof bottles upside down so ice is less likely to block the opening.
What additional gear do I need above treeline or in avalanche terrain?
Above-treeline travel may require stronger wind and face protection, goggles, warmer emergency insulation, shell pants, more robust navigation, and traction matched to hard surfaces and exposure. Technical terrain may require mountaineering crampons and an ice axe, but only with compatible boots, qualified instruction, and practiced skills.
Avalanche terrain requires far more than adding a transceiver, shovel, and probe. It demands current regional avalanche information, terrain-recognition and route-selection skills, partner-rescue practice, group judgment, and appropriate education. If the group lacks that preparation, choose a route outside avalanche and technical terrain.
Define the route and conditions first. Select compatible layers, boots, and traction second. Carry enough insulation and emergency capability to improve your ability to manage a delay. Test the complete system before departure, and keep cancellation and turnaround available throughout the day.
The safest winter hiking gear is not the longest checklist or the most technical product. It is equipment matched to the terrain, current conditions, and skills the user has already practiced.